A work order is a simple document that explains what job needs to be done, who’s responsible for it, and when it should be finished.
In maintenance, work orders keep things organized — whether it’s scheduling preventive maintenance, handling an emergency repair, or tracking costs. They help teams stay accountable, improve efficiency, and make sure no work request gets lost in the shuffle.
In this article, we’ll walk through the typical work order process, break down the steps for writing one, and answer the most common questions about creating and using maintenance work orders.
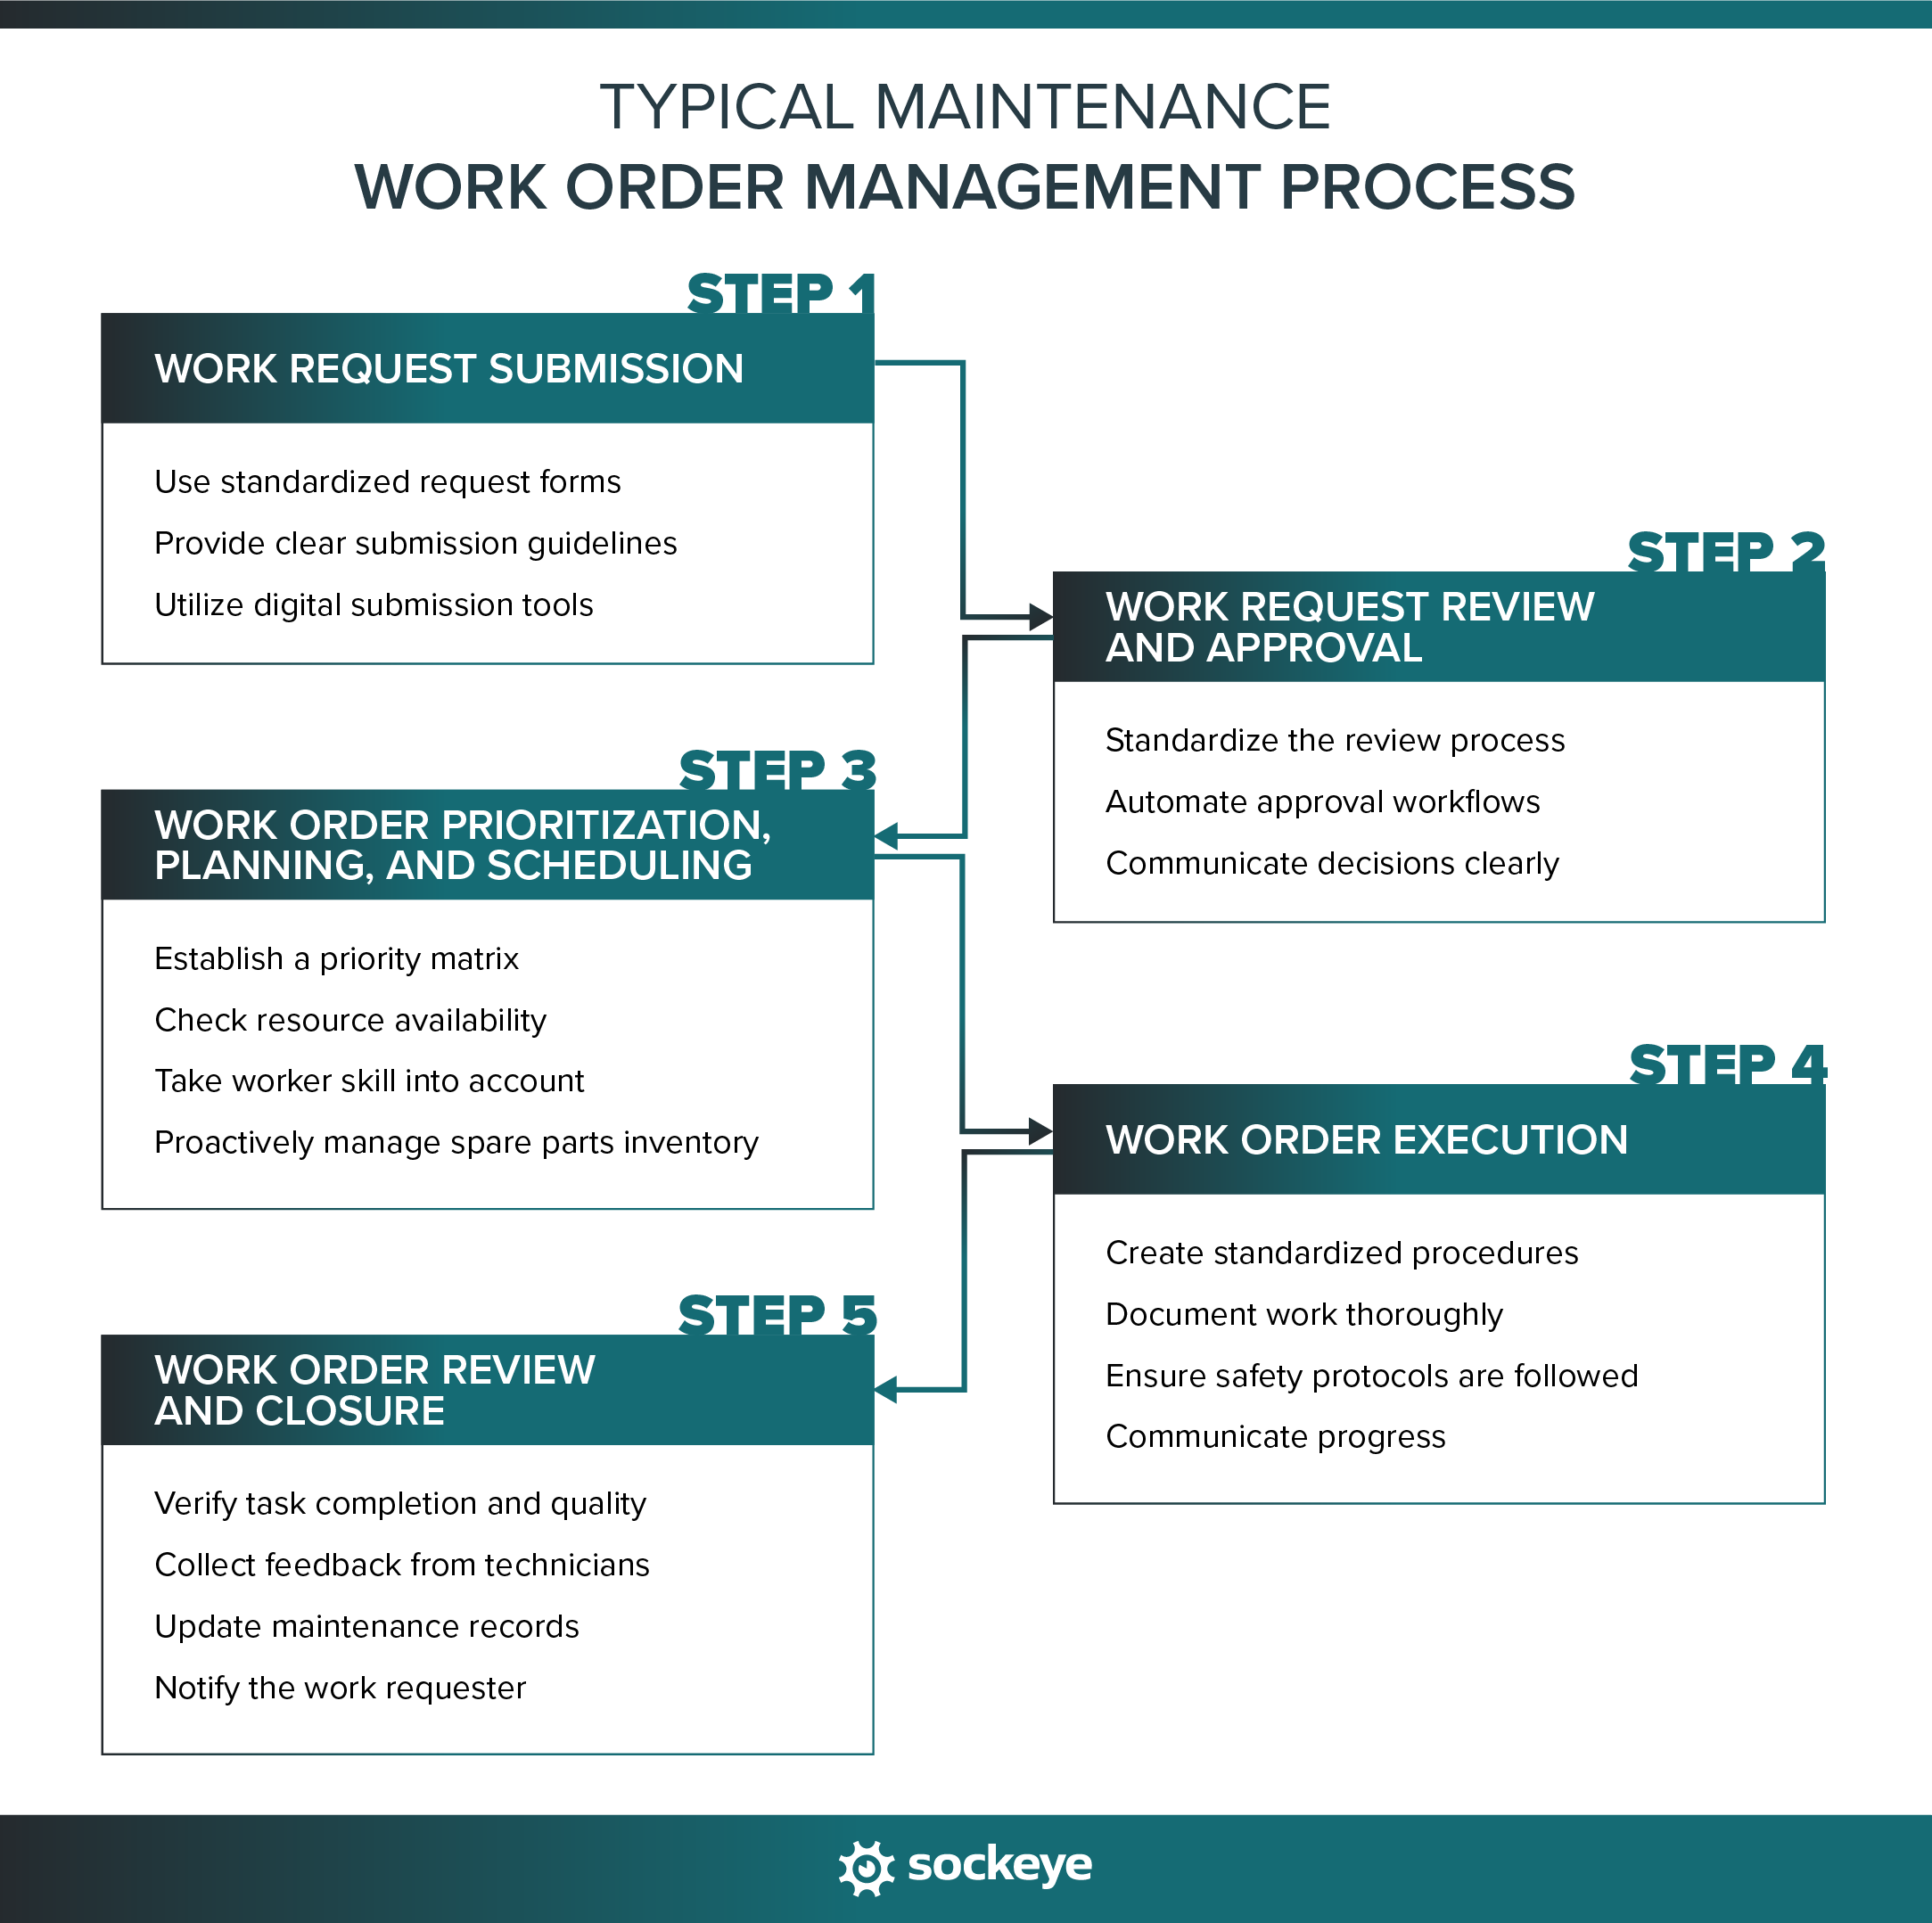
The typical work order management process
A work order often starts as a request. Someone notices a machine is making strange noises and submits a work request. The request is reviewed, approved, turned into a work order, and assigned to a technician. Once the work is completed, the order is closed, and the results are documented for future reference.
Recommended reading: Work Order Management Process and Best Practices
The most common types of work orders include:
- Preventive work orders: Scheduled maintenance work (like inspections, lubrications, and filter changes) that keep equipment running smoothly. Often abbreviated as “PMs”.
- Corrective work orders: Issued when something needs to be repaired, or adjusted following an inspection.
- Emergency work orders: Used for urgent issues that must be fixed immediately to avoid safety risks or costly downtime.
Work orders can also be internal or external. Internal work orders are handled by your in-house team, while external work orders are sent to outside contractors or service providers. The structure is the same, but external ones may need more detail around pricing and approvals.
How to write a work order step-by-step
As long as you have the required information, writing a clear work order is straightforward. Think of it as creating a checklist that ensures nothing important gets left out.
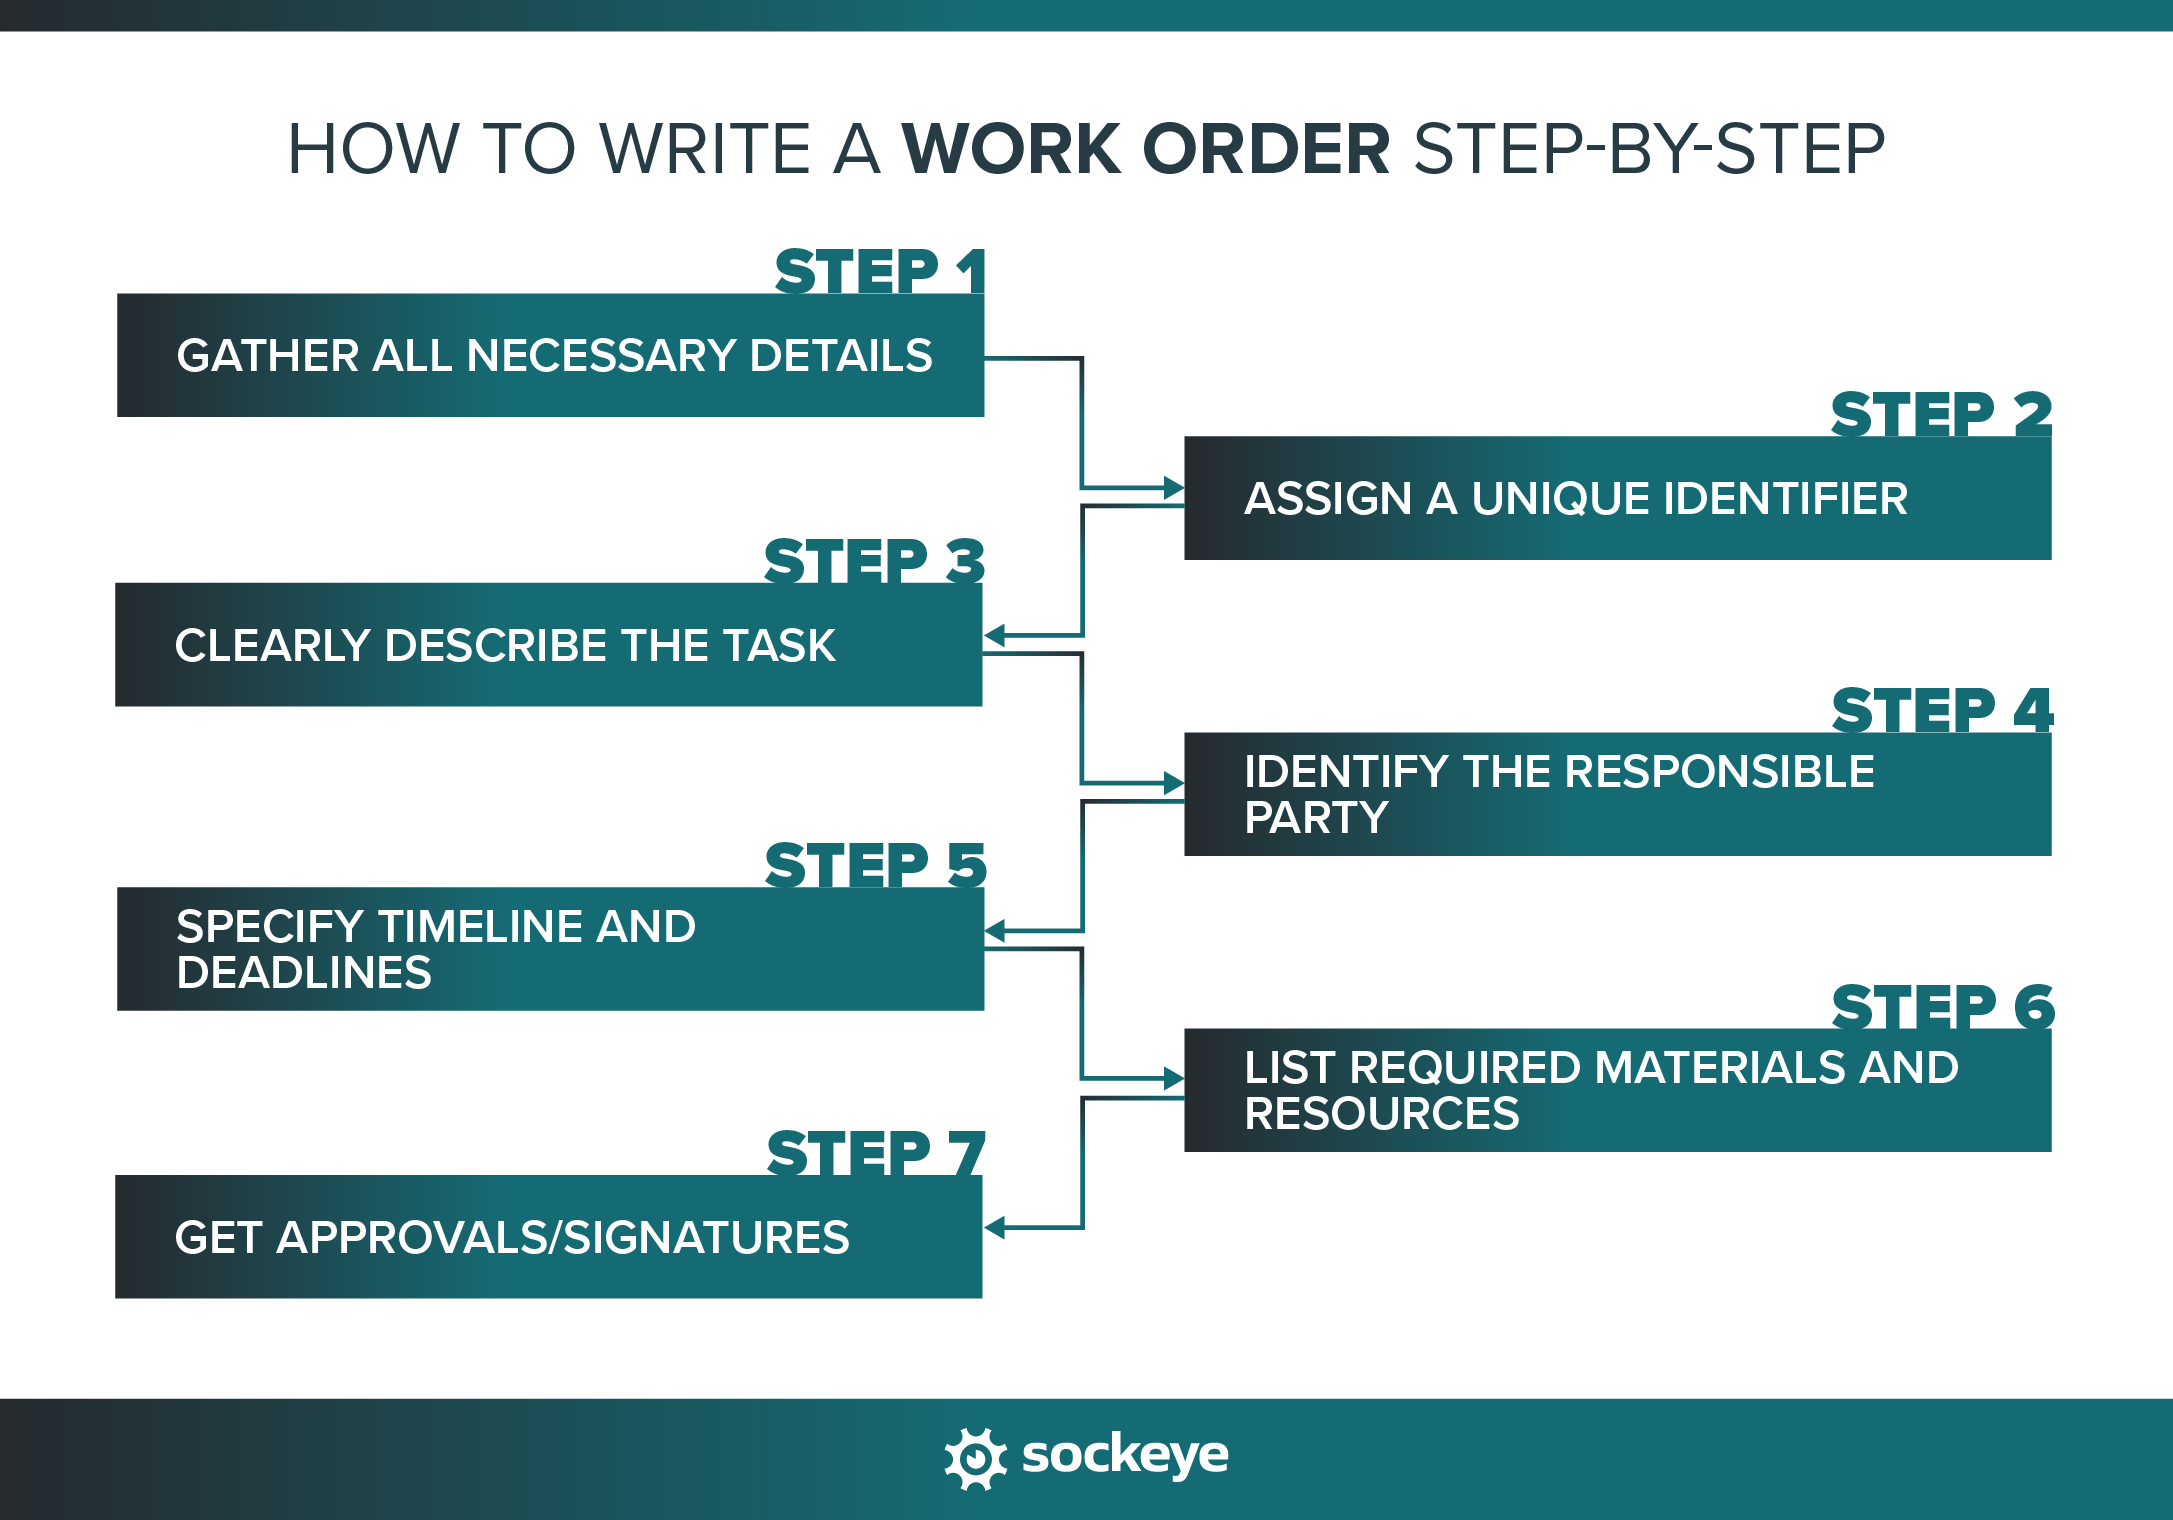
Step #1: Gather all necessary details
Before you start filling out the work order form, make sure you have the basics: what needs to be done, where the job will happen, who requested it, and what its priority is. The more info you have, the easier it will be to assign work and minimize potential back-and-forth later.
Step #2: Assign a unique identifier
Every work order should have its own number or code. This makes it easy to track, search, and reference later. Most CMMS software will generate IDs automatically, but even a manual system (like numbering them sequentially) helps avoid confusion.
Step #3: Clearly describe the task
Write a short, clear description of the job that needs to be done.
Avoid vague instructions like “Replace the conveyor belt on Line 3.” and instead be specific: “Inspect and replace the conveyor belt on Line 3, which shows visible fraying along the edges and has been causing occasional misalignment during production runs. Ensure the new belt is properly tensioned and aligned before restarting the line.”
The goal is to give the technician enough information to do the work without guessing.
Sometimes, especially for technicians in the field who have to handle customers’ requests, it can be helpful to include parts or even the whole original message from the work request.
For example: “Investigate and repair the air conditioning unit on the 2nd floor. The requester reported: ‘The AC has been running nonstop since Friday, but the office temperature won’t drop below 78°F. We also noticed a rattling noise coming from the vent above the conference room.’ Check refrigerant levels, inspect for mechanical wear, and ensure the system cycles off properly after repair.”
This extra context can make it easier to diagnose the problem and ensure nothing gets lost in translation.
Step #4: Identify the responsible party
Assign the work to the right person, shift, team, or contractor. If you’re using software, this is often just selecting a name from a dropdown or dragging and dropping a task to the first available slot.
If you’re doing it manually, write down who’s responsible so there’s no question about ownership.
Step #5: Specify timeline and deadlines
Every work order should include a due date, especially for emergency work. If the work order will take a few days or more to complete, it is smart to also include the start date. This helps prioritize tasks and keeps the schedule realistic.
This is where scheduling tools like Sockeye can make a big difference. By showing you real-time crew and contractor availability, Sockeye helps you assign work based on actual capacity instead of guesswork. That means your deadlines are more consistent, and you can easily level workload between teams.
Step #6: List required materials and resources
If the job needs specific parts, tools, or equipment, include them in the work order. This prevents delays when a technician arrives at the job site only to realize they don’t have what they need. Listing resources up front saves time and avoids multiple trips.
In some cases, it’s also useful to include cost estimates for the materials and labor involved. This is especially common in industries like construction, facilities management, or contracted services where the client needs to approve the cost before work begins.
Step #7: Get approvals/signatures
Finally, when needed, make sure the right person authorizes the work order — that can be a maintenance scheduler themself, a supervisor, or a client if it’s external work. Approvals confirm that the job is valid and resources can be used. In digital systems, this might just be a quick click, while on paper, it could be a signature at the bottom of the form.
The most common question about creating work orders
Even with a clear process, people often have the same questions when it comes to writing and managing work orders. Let’s go through the big ones so you can avoid common mistakes and set up a system that actually works for your team.
What to include in a work order?
A good work order includes just enough detail to guide the job without overloading the form with unnecessary info. Think of it as a balance between clarity and simplicity.
Here are the key elements most work orders should have:
- Unique ID: For tracking and referencing the order later.
- Task description: A clear, specific explanation of what needs to be done.
- Requester details: Who submitted the request and their contact info.
- Location: Where the work will take place and where the asset that needs work is located. This will often include start date, end date, and estimated time for completion.
- Assigned party: The technician, shift, team, or contractor responsible.
- Timeline/deadline: When the work should start and finish.
- Materials/resources: Parts, tools, or equipment needed to complete the job.
- Safety notes and checklists: Guidelines (like LOTO instructions) or hazards to keep in mind. Some teams also like to create and include PM checklists for routine work.
- Cost estimates (if applicable): Especially for jobs in construction, facility and property management, or contract work.
- Approvals/signatures: Confirmation that the work is authorized.
What is an example of a work order?
Let’s say a facility manager notices that the office air conditioning system isn’t cooling properly. They submit a request, which gets turned into a work order. The order might read something like this:
WORK ORDER EXAMPLE
- Work Order ID: 2025-0142
- Task Description: Inspect and repair the conveyor motor on Line 2. The requester wrote: “The conveyor started jerking during yesterday’s second shift, and production had to be stopped twice to reset it. It sounds like the motor is straining or slipping under load.” Check motor bearings, drive belt tension, and electrical connections. Replace or realign components as needed to restore smooth operation.
- Requester: Carlos Mendoza, Production Supervisor
- Location: Plant 3 – Packaging Area, Line 2
- Assigned To: Night shift
- Deadline: Complete before next production run (Oct 6, 2025)
- Materials/Resources: 5HP motor (spare in stock), alignment laser tool, motor mount hardware
- Safety Notes: Lockout/tagout required; use lift assist for motor removal.
- Estimated Cost: $480 parts + 4 hours labor
- Approval: Signed by Maintenance Manager
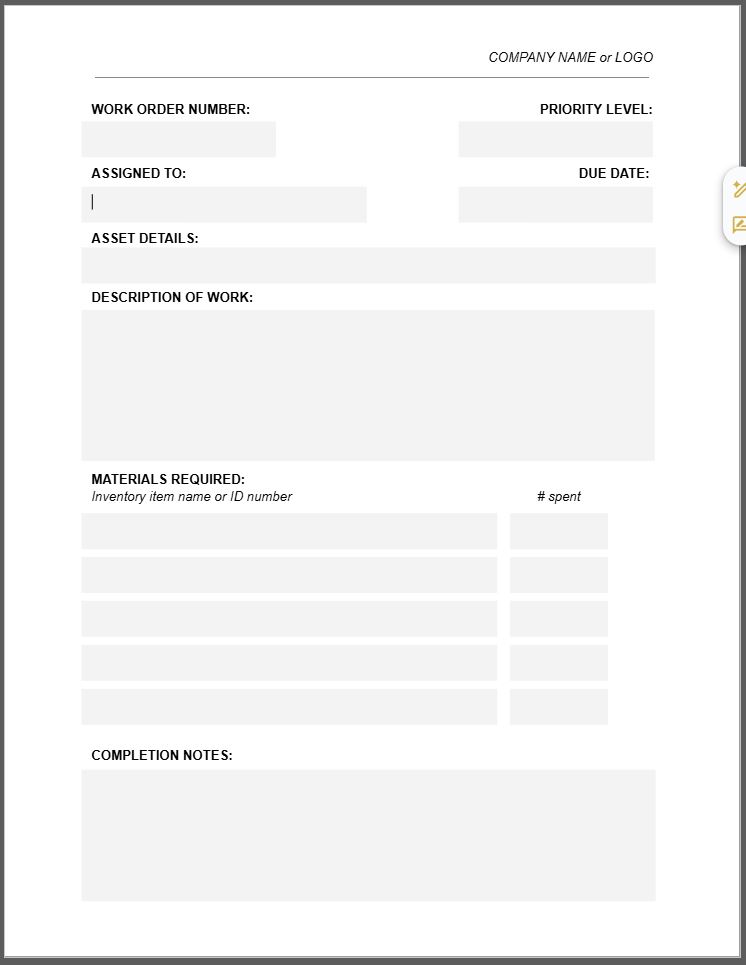
Here is an example of a simple maintenance work order form template:
How to make a work order letter?
A work order letter is a more formal version of a work order, usually written as a document or email rather than a form. It’s common in industries like construction, contracting, or when dealing with external vendors. The letter serves as both a request and an official authorization for the work.
To make one, include:
- Header information: Your company name, date, and contact details.
- Recipient details: The contractor or vendor’s name and address.
- Subject line: “Work Order for [specific job].”
- Job description: What needs to be done, where, and by when.
- Materials and costs (if applicable): Any agreed-upon pricing or estimates.
- Terms and conditions: Payment details, safety requirements, or special instructions.
- Signature/authorization: The manager or client who approves the job.
The format doesn’t need to be fancy — it just needs to be clear and professional so there’s no confusion about what’s expected.
How to make a work order form?
A work order form is the standardized document you use to capture all the details of a job. It can be paper-based or digital, but the idea is the same: keep all the important information in one place so nothing gets missed.
To make one, start with a simple layout that includes fields for ID, requester, task description, location, assigned party, timeline, materials, safety notes, and approvals. Depending on your industry, you can also add fields for cost estimates, priority level, or compliance requirements.
If you’re using software, most systems come with built-in forms that can be customized to fit your workflow.
How to make a work order template?
A work order template is just a reusable version of a work order form. Instead of creating one from scratch every time, you set up a standard format with all the necessary fields already in place. This ensures consistency, saves time, and makes it easier for your team to know what information is required.
You can create a template in Word, Excel, Google Sheets, or directly in your maintenance software. If you’re using paper forms, the easiest option is to download a free printable template and adapt it to your needs. For example, you can grab Sockeye’s free maintenance work order templates:
- Simple maintenance work order form template [GOOGLE DOCS]
- Simple maintenance work order form template [MS WORD]
If you are using a CMMS, ideally, you should be able to take their default WO form and configure it to your needs.
How to make a work order in SAP?
If your organization uses SAP, you can create and manage work orders directly in the Plant Maintenance (PM) module. The process usually looks like this (there will be some variation based on the version of the SAP you are using):
- Go to the Create Work Order transaction (IW31).
- Select the order type from the drop-down list.
- Define the priority of the work order you are creating.
- Select the location and the business area where the work will take place.
- Add a text description of the task in the “Long Text” text box.
- Add a short description of the work order.
- Include scheduling dates, materials, and any cost-related data.
- Save the work order to generate a unique order number.
If you’re using SAP PM S4HANA, you can find more info in this instructional video. You can also find some clues on their official resource pages, though they seem hard to navigate.
Tip: If you are getting tired of navigating multiple screens and taking ages to schedule and reschedule maintenance work in SAP, take a look at our unique SAP scheduling bolt-on called Sockeye. Simply connect SAP with Sockeye and start publishing weekly and daily schedules in minutes based on real-time labor availability.
Simplify work order scheduling with Sockeye
Managing work orders is easier when your scheduling tools work with you instead of against you. Sockeye is designed to help maintenance teams streamline work order scheduling by displaying real-time crew and contractor availability and keeping the entire scheduling workflow contained on a single screen.
Our customers consistently cut down scheduling and rescheduling time by 90%. The best part is that Sockeye can be learned in under two hours — it’s that simple to use.
You can test it for yourself by starting a free trial, which requires no IT involvement. As a part of the trial, we can even help you set up work order templates in your CMMS to make sure you are following best practices!